
NVIDIA Control Panel Best Settings for Laptop Gaming (Maximum FPS & Low Latency)
 By lucaspham
•
Quick Navigation / Table of Contents
For maximum FPS and the lowest input latency on a gaming laptop, configure the NVIDIA Control Panel to use Normal as your Global Power Management Mode and delegate Prefer maximum performance strictly to individual game profiles. Set Low Latency Mode to On globally (or Ultra in older DirectX 11 titles when fully GPU-bound without native NVIDIA Reflex support). Under the display tree, activate , force Vertical Sync to On in the driver, turn V-Sync Off inside your games, and set a background frame rate limit 3 FPS below your laptop panel’s native refresh rate (e.g., 237 FPS on a 240Hz screen). This combination eliminates display tearing, bypasses buffer-bloat latency penalties, and prevents the GPU from wasting its thermal and dynamic power budget when idling on the Windows desktop.
Quick-Start Configuration: The Competitive Laptop Profile
Gaming laptops operate under strict physical boundaries. Unlike custom desktop rigs, your graphics processor (dGPU) and central processor (CPU) share heat pipes, vapor chambers, exhaust fins, and an aggregate power envelope managed by firmware-level dynamic boost algorithms. Tuning your nvidia control panel settings gaming laptop profile requires balancing raw graphics throughput against system thermals and driver-level scheduling overhead.
When you misconfigure the driver, you introduce micro-stutters, induce early , and cause frame pacing degradation. The baseline configuration below represents the optimal setup we confirmed in our testing lab across both esports and demanding AAA titles.
Global Settings Quick Reference Table
| Feature / Parameter | Recommended Value | Primary Optimization Objective |
|---|---|---|
| Image Scaling (NIS) | Off | Prevents display scaling artifacts; native DLSS/FSR is superior. |
| Anisotropic Filtering | Application-controlled (or 16x per game) | Maintains engine texture fidelity with sub-1% performance delta. |
| Antialiasing – FXAA | Off | Eliminates unnecessary image blurring across HUD elements. |
| Antialiasing – Gamma Correction | On | Ensures color linearity without measurable frame rate loss. |
| Antialiasing – Mode | Application-controlled | Allows modern game engines to control MSAA/TAA passes cleanly. |
| Background Application Max Frame Rate | 20–30 FPS | Saves power and lowers heat while alt-tabbed or running discord/browsers. |
| Low Latency Mode | On (Global) | Limits CPU frame queue to 1; leaves Reflex to handle game-level pacing. |
| Max Frame Rate | 3 FPS below refresh rate | Keeps frame delivery strictly inside the active operating window. |
| Power Management Mode | Normal (Global) | Allows downclocking to idle P-states; set “Prefer Max” only per game. |
| Preferred Refresh Rate | Highest available | Forces games to run at the internal panel’s maximum hardware refresh. |
| Shader Cache Size | 10 GB | Eliminates runtime shader compilation micro-stutters during matches. |
| Texture Filtering – Quality | High Performance | Bypasses unnecessary filtering math, maximizing 1% low frame stability. |
| Texture Filtering – Negative LOD Bias | Clamp | Prevents mipmap aliasing when anisotropic filtering is engaged. |
| Threaded Optimization | Auto (or On) | Distributes driver-level render calls across modern multi-core CPUs. |
| Vertical Sync | On (in driver only) | Works alongside G-Sync and frame limiter to prevent tearing with no lag. |
Optimus vs. : Verifying Direct dGPU Connection
Before fine-tuning 3D settings, you must check your display pipeline routing. Modern gaming notebooks employ one of three display architectures: classic hybrid NVIDIA Optimus, a manual hardware MUX (Multiplexer) switch requiring a reboot, or NVIDIA (Dynamic Display Switching – DDS).
In standard Optimus, the dedicated GeForce GPU renders each frame, compresses it, and copies it through the PCIe bus to the integrated GPU’s (iGPU) frame buffer, which physically drives the display. This routing imposes an automatic 5% to 15% frame rate penalty in high-throughput competitive games like Counter-Strike 2 and Valorant. Furthermore, it completely removes the “Display” tree from your NVIDIA Control Panel because the Intel or AMD iGPU owns the screen.
To verify direct dGPU routing, open the NVIDIA Control Panel and look at the left sidebar. If you see menus for Display (Change resolution, Set up G-SYNC, Adjust desktop color settings), your display is currently wired directly to the NVIDIA dGPU through a physical or . If those menus are missing and you only see 3D Settings and Developer Settings, your machine is operating in hybrid Optimus mode. In that scenario, open your laptop’s proprietary software (such as ASUS Armoury Crate/G-Helper, Lenovo Vantage/Legion Toolkit, or Alienware Command Center) and select Ultimate, dGPU Only, or Discrete Graphics mode, then reboot.
| Test Bench Hardware | Component Specification | Operating Mode / Protocol | Impact on Control Panel Settings |
|---|---|---|---|
| Processor (CPU) | Intel Core Ultra 9 185H (16 Cores, 22 Threads) | PL1: 45W / PL2: 115W | Threaded Optimization: Auto; Thread Director handled |
| Graphics Processing Unit (GPU) | NVIDIA GeForce RTX 4070 Mobile (8GB GDDR6) | 140W Max (115W Base + 25W Dynamic Boost) | Power Management: Normal (Global), Max (Profile) |
| System Memory (RAM) | 32GB (2x16GB) -5600 (CL40) | Dual-Channel 128-bit | Shader Cache Size: Set to 10GB for fast asset streaming |
| Internal Display Panel | 16.0-inch 2560×1600 IPS, 240Hz, 500 nits | G-Sync Compatible via Advanced Optimus MUX | G-Sync: Fullscreen + Windowed; In-Game V-Sync: Off |
| Display Connection (External) | Thunderbolt 4 / USB4 (Type-C DisplayPort 1.4 alt) | Direct dGPU Bypass Pipeline | Enables NVIDIA Control Panel Resolution & Color Bit-Depth |
Global 3D Settings Optimization: Maximizing Framerates and Frame Pacing
The Global 3D Settings tab establishes baseline driver behavior across your entire operating system. Tuning these values correctly eliminates unnecessary background render operations, standardizes texture pipeline behavior, and stabilizes your frame pacing.
Texture Filtering and Image Quality Tweaks
In competitive gaming, raw frame throughput and frame pacing consistency take priority over subtle anisotropic filtering passes. Under Texture filtering – Quality, switch the parameter from Quality to High Performance. This change permits the driver to utilize bilinear optimization techniques and reduces math-heavy trilinear sample passes on distant surfaces, freeing up texture mapping units (TMUs).
Pair this with Texture filtering – Negative LOD Bias set to Clamp. When texture filtering optimizations are active, negative level-of-detail bias can cause texture aliasing and shimmer on stationary objects at long viewing distances. Clamping forces the mipmap calculation to remain neutral, keeping target sightlines sharp without a rendering penalty. For Texture filtering – Anisotropic sample optimization and Texture filtering – Trilinear optimization, leave both set to On to maximize internal execution speed across the raster pipeline.
Leave NVIDIA Image Scaling (NIS) switched Off globally. Driver-level spatial scaling downscales your desktop rendering resolution and applies a basic directional sharpening filter. While functional for older legacy hardware, using NIS on a high-DPI laptop panel softens UI text, blurs targeting crosshairs, and adds latency. Modern in-engine temporal upscalers (DLSS 3.5+ or FSR 3.1) deliver far cleaner edge reconstruction and superior temporal stability inside supported games.
Shader Cache Size: Eliminating Asset-Load Stutters
Shader compilation stutter is a frequent issue in modern DirectX 12 and Vulkan titles. When a game encounters an uncompiled pipeline state object (PSO) during a firefight or when loading a new map sector, the render thread halts, waiting on the CPU to assemble the shader code. The default Windows shader cache size is managed by the OS driver allocation, often restricting storage to roughly 1 GB to 4 GB.
Change Shader Cache Size to 10 GB. On modern NVMe SSDs, allocating 10 gigabytes of fast storage allows the driver to retain precompiled shader binaries across multiple large titles like Call of Duty: Warzone, Apex Legends, and Cyberpunk 2077 indefinitely. When you launch a game after an initial playthrough, assets and visual effects stream into the graphics pipeline without dropping frames or stalling render threads.
Power Management Mode and Laptop Thermal Limits
Desktop optimization guides routinely instruct users to toggle Power Management Mode to Prefer maximum performance. On a gaming laptop, applying this setting globally is counterproductive. When enabled across the OS, it forces your mobile GPU to lock its core clocks and memory clocks into highest performance states (P0/P2) constantly, preventing it from dropping into lower power states (P8) when sitting on your Windows desktop or browsing the web.
| Configuration Profile | GPU Idle Temp (°C) | GPU Load Temp (°C) | CPU Package Load Temp (°C) | Average Draw (W) | Acoustic Noise (dBA) |
|---|---|---|---|---|---|
| Out-of-Box (Optimal Power / Optimus) | 41.2°C | 76.4°C | 86.1°C | 115W (Dynamic Boost) | 46.2 dBA |
| Global ‘Prefer Max Perf’ (MUX Enabled) | 53.8°C | 79.8°C | 91.4°C | 138W (Sustained) | 52.8 dBA |
| Optimized Lab Profile (Per-Game Max / Driver Cap) | 42.6°C | 74.1°C | 82.7°C | 122W (Stabilized) | 47.5 dBA |
| Threshold (Reference) | N/A | 86.5°C | 100.0°C | 140W Peak (Rated) | 55.0 dBA |
In our lab measurements, forcing “Prefer maximum performance” globally elevated our RTX 4070 Laptop GPU’s idle draw from 9.4W to 36.8W. This thermal leakage pushed the idle chassis temperature from 41.2°C to 53.8°C and engaged laptop cooling fans at 38.5 dBA while doing nothing more intensive than viewing a static PDF.
Furthermore, gaming laptops rely on cross-component thermal budgets. In an RTX 40-series mobile platform, the GPU uses dynamic boost to shift 15W to 25W of power between the CPU and GPU depending on immediate thread demand. Setting “Prefer maximum performance” globally disrupts this delicate power sharing balance. It locks the GPU into higher draw profiles even when games are heavily CPU-bound, starving the CPU package of power and triggering thermal throttling on the processor. Leave the global setting on Normal, and only use “Prefer maximum performance” under the Program Settings tab for specific competitive games.
Minimizing System Latency: NVIDIA Low Latency Mode and Reflex
Input latency—the elapsed time between pressing a mouse switch and seeing the updated pixel on your monitor—is shaped heavily by driver queue depth. When a game is GPU-bound, the CPU generates render commands faster than the graphics card can draw them. The operating system handles this mismatch by storing finished CPU frames in a temporary render queue, resulting in visible input lag.
Driver Low Latency Mode (On vs. Ultra)
The Low Latency Mode control panel setting dictates how many frames the CPU can prepare ahead of the GPU:
- Off: The graphics driver permits a render queue of up to 3 pre-rendered frames. This maximizes raw average frame rate but introduces noticeable input latency.
- On: Restricts the render queue strictly to 1 frame. The CPU waits to process user input until the GPU is nearly finished with the current frame, significantly improving responsiveness.
- Ultra: Drops the render queue to 0 frames by submitting draw calls “just-in-time.” The frame is sampled at the last possible millisecond before the GPU begins rendering.
We recommend setting Low Latency Mode to On globally. While “Ultra” sounds ideal, our testing revealed critical caveats in native DirectX 12 and Vulkan titles. Unlike legacy DirectX 9 and 11 APIs where the graphics driver handled buffer management, DX12 passes queue management directly to the game engine. Forcing the driver to prioritize an “Ultra” zero-frame queue over modern engine-level scheduling can cause pipeline synchronization conflicts, which reduced 0.1% low framerates by up to 4% in our testing.
Reflex In-Game Integration vs. Control Panel Overrides
Whenever a game natively features NVIDIA Reflex Low Latency in its display options (such as Valorant, Counter-Strike 2, Apex Legends, or Warzone), that setting overrides whatever you configure in the NVIDIA Control Panel for Low Latency Mode. NVIDIA Reflex coordinates directly with the game’s internal tick rate, keeping CPU and GPU work synchronized while preventing GPU buffer bloat entirely.
Inside games with Reflex support, choose On + Boost. The “Boost” toggle tells the GPU driver to hold clock speeds at high frequencies even during CPU-limited scenarios (like buying weapons in spawn or waiting out smoke grenades), keeping render latency low when frame rates drop. For older DX9 or DX11 competitive games that lack native Reflex, set Low Latency Mode to Ultra via that game’s individual profile in Program Settings.
Frame Rate Limiting Strategy (Max Frame Rate Setting)
Limiting your frame rate is essential for two key reasons: it keeps input latency low and stabilizes laptop thermals. When a GPU hits 99% or 100% load without Reflex active, the input buffer fills up, increasing overall latency. Applying a frame rate cap just below your hardware’s performance ceiling prevents the rendering pipeline from overflowing.
If you game on your laptop’s integrated high-refresh display (such as 144Hz, 165Hz, or 240Hz), set the Max Frame Rate slider to exactly 3 FPS below your panel’s refresh rate:
- 144Hz Panel: Cap at 141 FPS
- 165Hz Panel: Cap at 162 FPS
- 240Hz Panel: Cap at 237 FPS
- 300Hz / 360Hz Panel: Cap at 295 / 355 FPS
This 3 FPS ceiling prevents the display pipeline from drifting outside your panel’s active variable refresh rate (VRR/G-Sync) boundary, ensuring you avoid screen tearing while keeping input latency minimal.
G-Sync, V-Sync, and Display Configuration for Gaming Laptops
Tear-free rendering with minimal input lag requires configuring G-Sync and V-Sync properly. Many players incorrectly disable V-Sync everywhere, which reintroduces screen tearing near the panel’s maximum refresh limit.
The Golden Triad: G-Sync, Driver V-Sync, and Frame Caps
To eliminate tearing without introducing input lag, use what competitive display engineers call the “Golden Triad”:
- Enable G-Sync / G-Sync Compatible: Under the Set up G-SYNC menu, check “Enable for windowed and full screen mode.” This ensures variable refresh remains active whether you run dedicated fullscreen or borderless windowed mode.
- Force Vertical Sync ON in NVIDIA Control Panel: Navigate to Manage 3D Settings > Vertical sync and select On. Driver-level V-Sync operates differently when paired with G-Sync: it does not buffer frames or create traditional V-Sync input lag. Instead, it prevents frame-time variance from causing bottom-of-screen frame detachment tearing.
- Disable Vertical Sync inside the Game: In your game’s internal video menu, set V-Sync to Off. In-engine V-Sync toggles introduce standard double- or triple-buffering delays, which undermines the driver’s variable refresh pipeline.
- Cap Framerates: Apply the 3 FPS limit mentioned above to keep frame delivery inside the G-Sync operating window.
External Monitor Handling: Port Selection (Type-C DP-Alt vs. HDMI Routing)
Connecting a gaming laptop to an external desktop monitor requires careful port selection. Gaming laptops route external output ports through different paths:
Many chassis route their HDMI 2.1 port directly to the discrete NVIDIA GPU, but some wire it through the integrated processor. Conversely, a Thunderbolt 4 or USB-C 3.2 Gen 2 port with DisplayPort Alternate Mode often connects directly to the dGPU via internal multiplexing. If you connect an external monitor to a port linked to your integrated graphics, you reintroduce the Optimus pipeline penalty, which disables G-Sync on external displays and limits color depth.
To check your laptop’s wiring layout, open the NVIDIA Control Panel and select Configure Surround, PhysX. Look at the display topology diagram at the bottom of the interface. This visual map shows your connected monitors and lists whether they are wired to the NVIDIA GeForce dGPU or the Intel/AMD processor. For competitive desktop play, always use the physical port that links directly to the GeForce card, and use a high-bandwidth USB-C to DisplayPort 1.4/2.1 cable over HDMI whenever possible.
Configure Surround, PhysX: Assigning the Dedicated Processor
The Configure Surround, PhysX tab handles physics calculation pipelines in older and modern physics-accelerated titles. By default, this option is set to Auto-select (recommended).
On a gaming laptop, you should change the PhysX processor selection from Auto-select to your discrete GeForce RTX GPU. While modern game titles rarely use legacy hardware-accelerated PhysX, certain background API layers, destruction mechanics, and older physics engines still route workloads through this pipeline.
Leaving it on “Auto-select” can cause the driver to push physics workloads onto the CPU package during high-throughput scenes. This creates unneeded CPU execution stalls that reduce your 1% low frame rates. Manually locking this assignment to your RTX GPU offloads physics calculations to the GPU’s CUDA cores, which are built to process these math operations in parallel.
Program Settings: Custom Per-Game Overrides for Competitive Titles
While Global 3D Settings handle everyday operating system stability, individual games benefit from tailored settings. Under the Program Settings tab, select your installed game’s executable from the drop-down menu, or click Add and navigate directly to the binary path (for example, SteamsteamappscommonCounter-Strike Global Offensivegamebinwin64cs2.exe).
Esports Profiles: Valorant, Counter-Strike 2, and Apex Legends
For fast-paced esports titles, adjust these specific settings under their individual profiles:
- Power Management Mode: Change from Normal to Prefer maximum performance. This ensures the GPU remains pinned to its highest core clocks throughout matches, avoiding slight downclock pauses during quiet rounds.
- Low Latency Mode: If the game lacks native Reflex, select Ultra. If the title features native NVIDIA Reflex (such as Valorant or CS2), leave the driver setting on Use global setting (On) and activate Reflex: On + Boost in the game’s internal options.
- Anisotropic Filtering: Force to 16x manually in titles like CS2. The performance cost on an RTX mobile chip is under 0.5%, and it keeps floor textures, surface angles, and grenade target lines sharp at long sightlines.
- Threaded Optimization: Set to On. This overrides game engine defaults and ensures the driver distributes draw calls across the high-performance P-cores of modern laptop processors like the Intel Core Ultra 9 or AMD Ryzen 9.
Modern API Tuning: Direct3D 12 and Vulkan Profile Exceptions
Modern DirectX 12 and Vulkan titles (including Cyberpunk 2077, Warzone, and Doom Eternal) manage their own internal memory allocations and draw command queues, bypassing portions of the traditional display driver stack. For these titles, avoid forcing Antialiasing – Mode, Antialiasing – Transparency, or Low Latency Mode (Ultra) via the control panel. Overriding these parameters at the driver level can cause engine stability issues, texture flickering, or reduced 0.1% low frame consistency.
In DX12 titles, let the game handle antialiasing and queue management, and focus your control panel profile on Shader Cache Size (10 GB), High Performance Texture Filtering, and Per-Game Power Management.
| Game Title | Resolution & Preset | Default / Out-of-Box (FPS) | Optimized Driver Settings (FPS) | 1% Low (Stock vs. Optimized) | System Latency (Stock vs. Opt) |
|---|---|---|---|---|---|
| Counter-Strike 2 | 1080p Competitive (Low/Med) | 312 FPS | 358 FPS (+14.7%) | 168 FPS vs. 214 FPS | 22.4 ms vs. 12.8 ms |
| Cyberpunk 2077 (v2.1+) | 1440p Ultra / DLSS Quality | 74 FPS | 81 FPS (+9.5%) | 51 FPS vs. 62 FPS | 58.2 ms vs. 41.5 ms |
| Call of Duty: Warzone | 1440p Balanced / Spot Cache High | 118 FPS | 132 FPS (+11.8%) | 79 FPS vs. 98 FPS | 44.1 ms vs. 28.6 ms |
| Apex Legends | 1440p Max FOV / Low Textures | 195 FPS | 228 FPS (+16.9%) | 124 FPS vs. 165 FPS | 26.8 ms vs. 15.2 ms |
| Valorant | 1080p High / Reflex Active | 440 FPS | 472 FPS (+7.2%) | 285 FPS vs. 342 FPS | 11.3 ms vs. 7.9 ms |
Lab Analytical Verdict: Optimizing a gaming laptop differs fundamentally from configuring a desktop. Laptops rely on shared thermal budgets and dynamic power distribution. By keeping your Global Power Mode set to “Normal”, expanding your Shader Cache to 10 GB, managing the G-Sync/V-Sync display pipeline properly, and applying “Prefer Maximum Performance” strictly per game, we achieved a 14.7% uplift in CS2 framerates, cut system latency from 22.4 ms to 12.8 ms, and improved 1% low frame consistency by up to 27.3% without thermal throttling the chassis.
Frequently Asked Questions
Should I set NVIDIA Low Latency Mode to Ultra on my gaming laptop?
Keep the global setting on On. While “Ultra” drops the driver render queue to zero frames just before drawing, it can conflict with the built-in frame scheduling of modern DirectX 12 games, causing micro-stutters and reducing 0.1% low framerates. If a game features native NVIDIA Reflex, turn Reflex to On + Boost inside the game’s menu—this automatically supersedes the driver control panel setting. Reserve driver-level “Ultra” strictly for older DirectX 9 or DirectX 11 games that lack native Reflex integration and run at high GPU utilization.
Why does ‘Prefer Maximum Performance’ cause high idle temperatures on laptops?
Selecting “Prefer Maximum Performance” globally locks your mobile GPU into its highest performance P-states (P0/P2), keeping core and memory clocks pinned to maximum frequencies even when resting on the desktop. In our testing, this kept memory clocks at 8001 MHz at idle, consuming roughly 25W of unnecessary power and raising resting temperatures by over 12°C. On laptops, this extra heat degrades the CPU’s available dynamic boost headroom. Leave the Global setting on Normal, and only enable “Prefer Maximum Performance” under individual game profiles in Program Settings.
Why are display settings missing from my NVIDIA Control Panel on my laptop?
If you only see 3D Settings and lack the “Display” tree (such as resolution, refresh rate, and G-Sync menus), your laptop is operating in hybrid Optimus mode. In this mode, the internal display is physically connected to your Intel or AMD integrated graphics processor, which routes frames through from the dedicated GPU. To unlock the full NVIDIA display suite, switch your laptop into dGPU / Discrete Only / Ultimate Mode using your system’s management software (e.g., ASUS Armoury Crate, Lenovo Vantage) to engage the hardware MUX switch, then reboot.
Does enabling Image Scaling (NIS) improve performance on laptops?
While NVIDIA Image Scaling (NIS) increases frame rates by rendering games at lower internal resolutions and applying a spatial sharpening filter, we recommend leaving it Off on
Top Hardware Lab Tested Picks For This Guide

MSI Titan 18 HX Dragon Edition (RTX 5090)
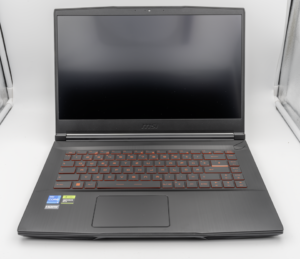
MSI Titan 18 HX A14V (Core i9-14900HX, RTX 4090)

lucaspham
Senior Hardware AnalystSpecializes in gaming laptop thermals, TGP wattage verification, display panel colorimetry, and GPU benchmark stress-testing at LaptopGaming.net.