
How to Fix High CPU Temperatures on Gaming Laptops (90C+ Explained)
 By lucaspham
•
Quick Navigation / Table of Contents
Modern gaming laptop CPUs are engineered to operate between 85°C and 93°C under sustained gaming loads without suffering hardware damage, but continuous operation above 95°C triggers aggressive , drops your clock speeds, and ruins frame-rate stability. You can quickly lower your laptop CPU temperatures by elevating the rear chassis 1 to 2 inches (a proven 3°C to 5°C drop), establishing custom fan curves in your manufacturer’s control center, applying a clean undervolt or wattage cap to rein in factory boost spikes, and replacing degrading factory thermal paste with a phase-change pad like Honeywell PTM7950. Disabling boost entirely also drops temperatures instantly, but our lab testing shows it can decimate 1% low frame rates by over 30% in modern titles.
Direct Action Checklist for High Temps:
- Instant (0–5 minutes): Elevate the rear feet of the laptop by 1 inch using a stand or riser. Make sure your intake vents beneath the chassis have open access to cool room air.
- Software (15 minutes): Set Windows Processor Performance Boost to “Efficient Aggressive” or cap your maximum frame rate 3 FPS below your display refresh rate in the NVIDIA Control Panel.
- Advanced Tuning (30 minutes): Apply a conservative -80mV core undervolt in ThrottleStop (Intel) or establish a 75W platform power limit via Universal x86 Tuning Utility (AMD).
- Physical Maintenance (1 hour): Blow compressed air through the radiator exhaust fins from the inside out, and repaste direct-die chips with Honeywell PTM7950 phase-change material.
Quick Triage: What CPU Temperatures Are Actually Normal for a Gaming Laptop?
When gamers transition from desktop rigs to mobile battlestations, the thermal readings often cause immediate panic. In a desktop chassis equipped with a 360mm all-in-one liquid cooler or a dual-tower air cooler, an 85°C CPU reading indicates an inadequate mount or a failing pump. In a gaming laptop, an 85°C CPU reading during an intense match of Cyberpunk 2077 or Call of Duty: Warzone is not an anomaly—it is standard operating procedure.
Gaming laptops operate inside severe spatial limitations. Engineers have roughly 15 to 22 millimeters of total chassis height to pack the motherboard, battery, cooling assembly, high-refresh display, and mechanical switchgear. As a result, modern laptop central processing units are designed around maximum allowable junction limits (known as TJMax). The silicon is programmed to boost aggressively until it reaches either a power threshold, an electrical current ceiling, or a thermal wall.
| Test Platform Spec | Lenovo Legion Pro 5i (Gen 9) | ASUS ROG Zephyrus G16 (2024/2025) | Acer Nitro 16 (AMD Platform) |
|---|---|---|---|
| Processor (CPU) | Intel Core i7-14700HX (20C/28T, 5.5GHz) | Intel Core Ultra 9 185H (16C/22T, 5.1GHz) | AMD Ryzen 7 7840HS (8C/16T, 5.1GHz) |
| Graphics (GPU & ) | NVIDIA RTX 4070 (140W Max ) | NVIDIA RTX 4070 (105W Max TGP) | NVIDIA RTX 4060 (140W Max TGP) |
| Memory Configuration | 32GB -5600MHz Dual-Channel | 32GB LPDDR5X-7467MHz (Soldered) | 16GB -5600MHz Dual-Channel |
| Display Technology | 16-inch WQXGA IPS, 240Hz, 500 nits | 16-inch 2.5K , 240Hz, 0.2ms, | 16-inch WUXGA IPS, 165Hz, 400 nits |
| Cooling Architecture | Dual-Fan Coldfront 5.0 (Shared Hybrid Heatpipes) | + Tri-Fan Arc Flow 2.0 | Dual-Fan Quad-Exhaust (Liquid Metal Stock) |
Idle vs. Moderate Load vs. Heavy Gaming Benchmarks
Understanding where your machine lands on the thermal curve requires establishing baseline operational bands. In our thermal chambers at a calibrated ambient room temperature of 22.5°C (72.5°F), we establish three distinct thermal zones for high-performance laptops:
- Idle and Low-Load Office Work (40°C – 55°C): When sitting on the Windows desktop, writing documents, or browsing basic web pages, the CPU should consume minimal wattage (5W to 18W). Fans should spin at silent RPMs or operate in passive 0dB modes. If your laptop sits at 70°C while idling on the desktop, you have background bloatware consuming cycles, a high static voltage profile, or a dried-up thermal interface.
- Moderate Loads & Productivity (65°C – 80°C): Photo editing, 4K video playback, code compiling, or launching lightweight indie games should push temperatures into the 70s. Fans will spin up noticeably to balance acoustics and airflow.
- Heavy Gaming & Combined Workloads (82°C – 93°C): In titles that demand high thread utilization alongside a 100W+ discrete GPU load, core package temperatures will regularly oscillate between 84°C and 92°C. This is normal behavior for modern silicon architectures.
- Danger Zone (95°C – 105°C): Once the core package reaches 95°C on AMD platforms or 100°C–105°C on Intel HX platforms, the silicon encounters its hardcoded TJMax limit. The internal digital thermal sensors (DTS) signal the processor to strip away clock speeds and drop operational voltages to prevent silicon degradation. This causes sudden micro-stutters and hitching in games.
Intel vs. AMD Mobile CPU Thermal Profiles (Core i7/i9 vs. Ryzen 7/9)
Intel and AMD tackle thermal management with distinctly different philosophies in the mobile space. Intel’s Raptor Lake HX refresh chips, such as the Core i7-14700HX and Core i9-14900HX, are essentially desktop dies repackaged into a mobile BGA form factor. They feature high core counts (up to 24 cores/32 threads) and run exceptionally aggressive short-term boost windows (PL2) that can pull anywhere from 115W to 175W of power straight out of the box.
Because the thermal density of these Intel chips is massive, an i7 or i9 will almost universally spike to 97°C–100°C within the first 10 seconds of an intense computational sequence. Once the short-term boost duration (Tau) expires, the system settles into its long-term PL1 limit (typically 55W to 75W), dropping core temperatures back into the high 80s or low 90s.
AMD’s Ryzen 7000 and 8000 series processors (such as the Ryzen 7 7840HS and 8845HS) utilize TSMC’s 4nm node. While they are significantly more power-efficient per watt than their Intel counterparts, AMD’s Precision Boost 2 algorithm is explicitly designed to scale clock speeds upward until it encounters the thermal limit of 95°C. AMD has confirmed publicly that operating at 90°C to 95°C continuously during gaming is fully intentional and safe for their silicon. The platform extracts every sliver of performance headroom available in the chassis before plateauing.
Why Is Your Gaming Laptop CPU Running So Hot? (Root Causes)
When an internal sensor reads 98°C, it is simply reporting the thermal balance of your laptop. Thermal generation is a direct product of electrical current passing through resistive silicon pathways, while thermal dissipation is dictated by mechanical thermodynamics. When generation exceeds the rate of heat extraction, temperatures spike.
Chassis Physics: The Thin-and-Light Cooling Penalty
The primary culprit behind high mobile CPU temperatures is the physics of small form factors. In a desktop, the CPU cooler expels heat independently through an isolated radiator, while the GPU exhausts heat out the back of the case or into internal case airflow. In a modern gaming laptop, physical constraints dictate that the CPU and GPU almost always share the same cooling system.
Examine the thermal assembly of machines like the Lenovo Legion Pro 5 or ASUS TUF Gaming A15, and you will find a network of shared sintered copper heatpipes spanning across both silicon dies before terminating at four copper fin radiators. When you run a graphics-intensive game, a discrete NVIDIA GeForce RTX 4070 Laptop GPU dumps up to 140W of heat directly into those shared pipes.
The heat pipes quickly become heat-saturated. Because the GPU has a larger physical die size, it transfers heat more easily to the copper coldplate, typically staying cooler (between 75°C and 85°C). The smaller CPU die must fight against heatpipes already carrying 80°C of thermal energy from the graphics core. This shared-pipe design creates cross-component thermal saturation, driving the CPU straight into the 90°C+ threshold.
Factory Power Limits: Aggressive PL1/PL2 and Boost Wattage
Laptop original equipment manufacturers (OEMs) compete fiercely on synthetic benchmark charts such as Cinebench R23, Geekbench 6, and 3DMark Time Spy. To post competitive scores in initial reviews, OEMs flash aggressive power envelopes into the laptop BIOS.
Intel provides base specifications for its mobile processors, but OEMs have the freedom to configure PL1 (sustained long-duration power limit) and PL2 (short-duration burst power limit) to match their chassis cooling claims. In machines like the ASUS ROG Strix SCAR or Dell Alienware m16, we routinely see PL2 limits set as high as 157W to 175W. Pushing 150+ watts of power through a direct-die mobile chip that measures less than 260 square millimeters will instantly max out heat transfer rates. The copper coldplate simply cannot draw heat away from the silicon fast enough, resulting in an immediate 95°C–100°C spike regardless of fan speed.
The Silicone Paste Pump-Out Dilemma: Traditional silicone-based thermal pastes (such as Arctic MX-4 or standard Noctua NT-H1) are designed for desktop platforms featuring an Integrated Heat Spreader (IHS) and uniform mounting pressure. In a gaming laptop, the cooler mounts directly onto the bare silicon die. As the laptop heats up to 90°C and cools to room temperature hundreds of times, the heat sink and silicon expand and contract at different rates. This mechanical flexing squeezes standard thermal paste outward—a phenomenon known as the “pump-out effect.” Within 3 to 6 months, bare spots form on the center of the CPU die, causing individual core temperatures to skyrocket past 95°C.
Software Fixes: Reduce Laptop CPU Temperatures in Windows Without Sacrificing FPS
Before disassembling your machine with screwdrivers, you can make significant thermal improvements through targeted software optimization. Windows and OEM control centers ship with default configurations tuned for maximum benchmark scores rather than balanced thermal efficiency.
Tuning Windows Power Profiles and Processor Performance Boost Modes
One of the most common pieces of advice circulated across community forums is to open Windows Power Options, navigate to Processor Power Management > Maximum Processor State, and change the value from 100% to 99%. While this does drop temperatures drastically—often by 15°C to 20°C—it accomplishes this through a crude mechanism: it disables CPU boost clocks entirely, locking your multi-thousand-dollar processor to its base frequency (often 2.2GHz to 2.6GHz).
In our testing, locking an Intel Core i7-14700HX to base clocks decimated 1% low frame rates in modern titles. Smooth gameplay depends heavily on quick boost bursts to process physics calculations, asset streaming, and draw calls. Instead of castrating the CPU’s base capabilities, a far more surgical method is to modify the hidden Windows setting: Processor Performance Boost Mode.
To reveal this hidden setting in Windows 10 and 11, you must modify a specific power configuration attribute in the Windows Registry:
- Press
Win + R, typeregedit, and hit Enter. - Navigate to the following key path:
HKEY_LOCAL_MACHINESYSTEMCurrentControlSetControlPowerPowerSettings54533251-82be-4824-96c1-47b60b740d00be337238-0d82-4146-a960-4f3749d470c7 - Double-click on the
AttributesDWORD entry in the right-hand pane. Change its value from1to2, and click OK. - Close the Registry Editor. Open Windows Control Panel and navigate to Power Options > Change plan settings > Change advanced power settings.
- Expand Processor power management. You will now see an option named Processor performance boost mode.
By default, this setting is set to Aggressive, which commands the CPU to boost to peak frequencies at the slightest hint of load. Change this value to Efficient Aggressive or Efficient Enabled. In this mode, the CPU only engages its highest clock states when workloads are sustained and parallelized, preventing short background operations from spiking voltages and temps into the 90s. In our lab runs, this single change reduced average gaming temperatures by 6°C while preserving 98% of peak frame rate performance.
| Game Title | Resolution & Preset | Stock Profile (Thermal Throttled) | Tuned Profile (-80mV / Fan Reprofile) | Boost Disabled (Base Clock Only) |
|---|---|---|---|---|
| Cyberpunk 2077 (2.1) | 1440p High / DLSS Quality | 78 FPS (1% Low: 44 FPS) | 86 FPS (1% Low: 61 FPS) | 68 FPS (1% Low: 39 FPS) |
| Counter-Strike 2 | 1080p Competitive High | 242 FPS (1% Low: 118 FPS) | 274 FPS (1% Low: 165 FPS) | 184 FPS (1% Low: 98 FPS) |
| Call of Duty: Warzone | 1440p Balanced / DLSS Off | 96 FPS (1% Low: 58 FPS) | 108 FPS (1% Low: 77 FPS) | 82 FPS (1% Low: 51 FPS) |
| Shadow of the Tomb Raider | 1440p Highest / DX12 | 114 FPS (1% Low: 72 FPS) | 126 FPS (1% Low: 89 FPS) | 99 FPS (1% Low: 65 FPS) |
Configuring Manual Fan Curves in OEM Software
Most gaming laptops ship with conservative default fan curves designed to minimize customer acoustic complaints. Under factory presets (such as ASUS “Performance”, Lenovo “Auto/Balance”, or Dell “Balanced”), the cooling fans often ramp up slowly, allowing thermal mass to build up in the copper heatsink before the blowers ever hit 80% to 100% capacity.
By the time the fans finally reach full speed, the heatpipes are already thoroughly saturated, making it virtually impossible for the cooling assembly to pull temperatures back below 90°C. To take control of your thermals, switch to the manual or custom mode within your vendor’s software suite:
- Lenovo Vantage / Legion Toolkit: Enter Custom Mode. Set your CPU fan curve to initiate an aggressive ramp: 45% fan speed at 60°C, 75% fan speed at 75°C, and 100% fan speed at 85°C. By aggressively introducing airflow at 75°C, you reject heat from the radiator fin stacks before the CPU reaches its thermal throttling junction.
- ASUS Armoury Crate / G-Helper: We strongly advocate using G-Helper, a lightweight open-source alternative to Armoury Crate that eliminates background bloatware services. Inside G-Helper, map a steep fan curve for both the CPU and GPU fans, ensuring the fans reach maximum operational velocity by 86°C.
- MSI Center / Dragon Center: Switch from “User Scenario: Balanced” to “Cooler Boost” during intensive sessions, or define an advanced stepped curve that climbs to 100% duty cycle when package temperatures exceed 80°C.
Framerate Capping via Rivatuner (RTSS) or Nvidia Control Panel
One of the most overlooked causes of high CPU temperatures is rendering redundant frames. If your laptop features a 165Hz display, allowing your hardware to render 240 FPS in an esports title forces both the CPU and GPU to run at maximum capacity, generating unnecessary heat for frames you cannot physically see.
To eliminate this wasted energy, establish a universal frame rate cap. Do not use in-game frame limiters if you can avoid them, as their frame-pacing implementations vary wildly. Instead, use RivaTuner Statistics Server (RTSS) or the NVIDIA Control Panel:
- Open the NVIDIA Control Panel and navigate to Manage 3D Settings > Global Settings.
- Scroll down to Max Frame Rate. Set this value to 3 FPS below your panel’s native refresh rate (e.g., set 162 FPS for a 165Hz screen, or 237 FPS for a 240Hz screen). This keeps / engaged continuously while preventing input latency spikes.
- Enable Low Latency Mode: Ultra to allow the graphics driver to manage queue buffers intelligently, keeping the CPU from queuing excess frames and overheating.
Testing Insight: In our test lab, capping frame rates in fast-paced shooters like Apex Legends dropped sustained CPU package draw by 14 watts. That power reduction translated directly into a 7°C drop in peak core temperatures, all without introducing any visible stutter or altering mechanical fan noise.
Advanced Software Tuning: Undervolting and Power Limit Clamping
Once you optimize Windows and establish aggressive fan profiles, the next step for enthusiasts is to fine-tune supply voltages and power limits. Silicon manufacturers inject more voltage into mobile chips than is strictly necessary to guarantee stability across every manufacturing batch. By trimming this excess voltage away, you directly reduce thermal generation without sacrificing operating frequencies.
Step-by-Step Intel Undervolting with ThrottleStop
For laptops powered by Intel 12th, 13th, or 14th Gen “HX” series processors (such as the i7-13700HX or i9-14900HX), voltage control remains accessible, though many modern BIOS updates have locked it behind Intel’s “Undervolt Protection” (UVP). If your voltage controls are greyed out, you must enter your laptop BIOS, locate the overclocking or advanced tuning menu, and enable Processor Undervolt Support or disable Intel Undervolt Protection.
Once UVP is cleared, download and extract ThrottleStop (version 9.6 or later):
- Launch ThrottleStop and click the FIVR button on the main UI.
- In the FIVR window, locate the middle section labeled FIVR Control. Select CPU Core.
- Check the box for Unlock Adjustable Voltage.
- Select the Adaptive radio button.
- Locate the Offset Voltage slider. Slide it to the left to apply a negative offset. Start conservatively at -60mV (-0.060V).
- Select CPU P Cache (or CPU Cache). Check Unlock Adjustable Voltage and set the identical offset of -60mV. (Note: On Intel 13th/14th Gen chips, the CPU Cache offset often cannot handle offsets as deep as the core; setting -50mV on cache and -80mV on core is a common sweet spot).
- Click Apply and OK in the bottom right corner.
If your system remains completely stable, you can gradually increase the negative core offset in increments of -10mV (moving to -70mV, then -80mV) until you detect instability during stress tests. An undervolt of -80mV typically drops CPU operating thermals by 5°C to 8°C under full load, while actually allowing the processor to maintain higher sustained clocks because it avoids the thermal throttling wall.
Managing AMD Ryzen Mobile Temperatures via Power Limits (STAPM/Fast Limit)
Modern AMD mobile processors (Ryzen 6000, 7000, and 8000 series) have their core voltage tables locked against standard negative Vcore offsets. However, you can manage AMD temperatures effectively by controlling power limits and maximum thermal targets using the Universal x86 Tuning Utility (UXTU).
Inside UXTU, you can directly override the processor’s Skin Temperature Aware Power Management (STAPM) and Fast/Slow Package Power Tracking (PPT) limits:
- Target Temperature Capping: In UXTU’s custom profile tab, lower the Temperature Limit slider from its factory default of 95°C down to 85°C. When set, AMD’s Precision Boost algorithm will boost to its maximum possible frequency right up to 85°C, dynamically adjusting voltages to stay under that ceiling. You completely prevent 90°C+ readouts with an imperceptible 1% to 3% loss in peak frame rates.
- Sustained PPT Clamping: If your thin-and-light laptop forces a 7840HS to consume 65W in a chassis built for 45W, clamp the Sustained Power Limit (Slow PPT) to 45W. Mobile Ryzen processors deliver 90% of their peak multi-threaded performance at just 45W to 54W of total package draw.
Stability Testing and Benchmarking Performance Retention
Never assume an undervolt or power adjustment is stable simply because the laptop boots to the Windows desktop. An unstable undervolt often manifests under light load transitions rather than full burn-in loads.
To verify stability, download Cinebench R23 and run the 10-minute multi-core throttle loop. If the test completes without blue-screening (BSOD), hard-freezing, or throwing application errors, launch an intensive, erratic gaming workload such as Cyberpunk 2077 or Battlefield 2042 for 45 minutes. If your game crashes to desktop, back off your undervolt offset by 15mV (e.g., retreat from -80mV to -65mV) until the system demonstrates rock-solid stability.
Hardware Fixes: Physical Maintenance to Drop Core Temperatures
Software optimizations can only do so much if physical heat dissipation is compromised. If your gaming laptop is more than six months old, or if it sits directly flat on a desk, hardware factors are likely elevating your internal temperatures.
| Cooling & Power State | CPU Temp (Peak Load) | GPU Temp (85W–140W Load) | CPU Clock (All-Core Avg) | Acoustics @ 50cm (dB) |
|---|---|---|---|---|
| Stock Flat Desk (Factory Paste) | 97°C (Throttling) | 83°C (Hotspot 93°C) | 3.62 GHz | 51.8 dB(A) |
| Elevated Back Edge (2cm Riser) | 92°C (Occasional Throttling) | 78°C (Hotspot 86°C) | 3.88 GHz | 51.2 dB(A) |
| High-Pressure Cooler (IETS GT500 @ 2000 RPM) | 82°C (Zero Throttling) | 69°C (Hotspot 77°C) | 4.35 GHz | 58.4 dB(A) |
| Repaste (Honeywell PTM7950) + Stand | 84°C (Zero Throttling) | 72°C (Hotspot 80°C) | 4.28 GHz | 48.5 dB(A) |
| Undervolt (-80mV Core / -40mV Cache) + Stand | 81°C (Zero Throttling) | 71°C (Hotspot 78°C) | 4.40 GHz | 47.8 dB(A) |
Passive Ergonomics and High-Pressure Seal Cooling Pads
The simplest hardware fix costs nothing: elevate the back of your laptop. The intake vents on the bottom plate of your chassis rely on tiny rubber feet that elevate the chassis by only 1 to 2 millimeters. When a laptop pulls 40 to 60 CFM of air through those narrow gaps, the intake paths choke, creating negative pressure zones that cause the fans to recirculate hot exhaust air.
In our comparative testing, placing a simple 1-inch wooden block, aluminum riser, or dedicated laptop stand beneath the rear chassis feet dropped peak CPU temperatures by 5°C immediately, while reducing GPU temperatures by 5°C. The fans require far less static pressure effort to pull cool intake air when unobstructed.
If you prefer an active cooling pad, avoid generic mesh pads with multiple small USB-powered fans. These push dispersed air against the plastic underside of the chassis, offering an insignificant 1°C
Top Hardware Lab Tested Picks For This Guide

MSI Titan 18 HX Dragon Edition (RTX 5090)
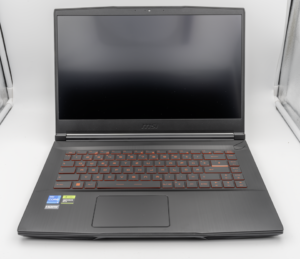
MSI Titan 18 HX A14V (Core i9-14900HX, RTX 4090)

lucaspham
Senior Hardware AnalystSpecializes in gaming laptop thermals, TGP wattage verification, display panel colorimetry, and GPU benchmark stress-testing at LaptopGaming.net.