
MUX Switch & Advanced Optimus Explained: Unlock Free 15% FPS on Your Laptop
 By lucaspham
•
Quick Navigation / Table of Contents
A MUX (multiplexer) switch is a physical hardware circuit on a laptop motherboard that routes display signals directly from the dedicated graphics card (dGPU) to the internal screen, completely bypassing the integrated GPU (iGPU). Bypassing this integrated bottleneck delivers an immediate 5% to 25% increase in average frame rates and cuts system latency significantly in competitive games. In this deep-dive guide, we will break down the engineering behind the display pipeline, analyze our real-world benchmark data, and show you exactly how to enable it on your machine.
What Is a and How Does It Work?
To understand why a MUX switch provides such a dramatic performance uplift, you must first look at how mobile graphics architectures historically handled video output. For over a decade, gaming laptops prioritized battery life above peak graphics throughput. This design philosophy created an architectural compromise that still impacts many machines today.
The Traditional Display Routing Bottleneck (NVIDIA Optimus / MS Hybrid)
Under a standard dynamic graphics configuration—commonly referred to as NVIDIA Optimus or Microsoft Hybrid Graphics (MSHybrid)—the dedicated GPU operates as an offscreen rendering co-processor. When you launch a title like Counter-Strike 2, the dGPU renders the 3D geometry and shades the pixels. However, the dGPU does not have a physical trace wired to your laptop’s embedded DisplayPort (eDP) panel connector.
Instead, the dGPU copies completed frames from its local high-speed buffer over the motherboard’s PCIe bus to system memory (DRAM). From there, the CPU’s integrated memory controller feeds the frame buffer into the integrated GPU (such as an Intel Iris Xe, Intel Arc core, or AMD Radeon 780M/890M). The iGPU acts as the sole display controller, outputting the final image to your screen.
This pipeline creates three major bottlenecks:
- System Memory Contention: The display stream consumes valuable memory bandwidth. Dual-channel -5600 provides roughly 89.6 GB/s of theoretical throughput. Forcing the CPU and iGPU to shuffle uncompressed 1440p or 4K frame buffers across this shared bus at 240Hz starves the CPU cores of critical memory access.
- Frame Presentation Latency: Passing rendered frames across PCIe lanes through two distinct GPU architectures adds a measurable hardware pipeline delay, typically ranging between 3.5ms and 7.2ms.
- Feature Loss: Advanced display features native to your dGPU, such as NVIDIA , cannot function because the panel is tied directly to the display controller of the iGPU.
The Direct dGPU Connection: Hardware Architecture Explained
A hardware MUX switch resolves this data bottleneck through pure hardware routing. Motherboard engineers place a physical multiplexer integrated circuit (IC) on the PCB between the graphics chips and the panel. This electronic switch routes the high-speed differential eDP trace lines directly to either the integrated GPU or the discrete GPU.
When you toggle your laptop into “Discrete GPU” or “dGPU Only” mode, the multiplexer severs the trace connection to the iGPU and locks the connection to your dedicated chip. The dGPU’s internal display engine controls the laptop’s display panel directly.
This direct trace connection completely eliminates PCIe round-tripping through system DRAM. Furthermore, removing display presentation responsibilities from the CPU package reduces CPU Package Power draw by 8W to 14W during high-refresh 1080p and 1440p rendering. In modern hybrid processors like the Intel Core i9-14900HX or AMD Ryzen 9 8945HS, this thermal saving allows the processor to maintain higher sustained boost clocks without hitting ceilings.
Does a MUX Switch Improve Performance? Real-World Benchmarks
To quantify the real-world impact of eliminating this routing penalty, we ran extensive empirical tests in our hardware testing lab. We tested an ASUS ROG Strix SCAR 16 inside a temperature-controlled 24.0°C chamber. The machine features an Intel Core i9-14900HX, an NVIDIA GeForce RTX 4080 Laptop GPU running at its maximum 175W Total Graphics Power (), and 32GB of dual-channel -5600 RAM.
We benchmarked five demanding titles across both MSHybrid (Optimus) mode and direct dGPU (MUX On) mode. All background processes were standardized, and drivers were locked to the latest Game Ready release.
| Game Title | Resolution & Preset | Optimus (MSHybrid) Avg / 1% Low | dGPU Mode (MUX On) Avg / 1% Low | Performance Delta (%) |
|---|---|---|---|---|
| Counter-Strike 2 | 1080p Very High | 278 FPS / 142 FPS | 346 FPS / 198 FPS | +24.5% Avg (+39.4% Lows) |
| Valorant | 1440p High | 385 FPS / 210 FPS | 472 FPS / 295 FPS | +22.6% Avg (+40.5% Lows) |
| Call of Duty: Warzone | 1440p Balanced (DLSS Quality) | 118 FPS / 78 FPS | 134 FPS / 94 FPS | +13.6% Avg (+20.5% Lows) |
| Cyberpunk 2077 (v2.1) | 1440p Ultra (No RT) | 84 FPS / 61 FPS | 89 FPS / 68 FPS | +6.0% Avg (+11.5% Lows) |
| Alan Wake 2 | 1440p High (DLSS Quality) | 67 FPS / 52 FPS | 70 FPS / 56 FPS | +4.5% Avg (+7.7% Lows) |
Competitive Esports vs. GPU-Bound AAA Titles
Our benchmark results clearly show how the display pipeline affects different gaming workloads. In competitive, high-refresh titles like Counter-Strike 2 and Valorant, the performance gains from switching the MUX are staggering. Counter-Strike 2 surged by 24.5% in average frame rates, while Valorant saw an uplift of 22.6%.
Why do esports titles see such massive gains? At 300+ frames per second, the sheer volume of frame buffer transfers completely saturates the iGPU’s shared memory bandwidth. In standard Optimus mode, our telemetry logged RTX 4080 GPU utilization hovering at just 76% in CS2 because the graphics processor stalled while waiting for the CPU ring bus to clear frame deliveries. Flipping the hardware MUX switch drove dGPU utilization to a solid 97%, instantly unlocking the full compute capacity of the silicon.
Conversely, graphically intensive AAA titles like Cyberpunk 2077 and Alan Wake 2 are heavily GPU-bound. Because frame rates remain lower (60 to 90 FPS), the bus contention across the PCIe interface is far less severe. As a result, Cyberpunk 2077 saw a more modest 6.0% gain in average FPS. However, focusing solely on average frame rates misses the most important performance metric: frame time stability.
Frame Time Consistency, 1% Lows, and Input Latency Improvements
While a 6% average FPS gain in Cyberpunk 2077 might appear unremarkable on paper, the frame time pacing tells a completely different story. During our benchmark runs through the demanding Dogtown district, we recorded 1% low frame rates jumping by 11.5%. Frametimes tightened from an erratic 16.3ms down to a consistent 14.7ms, entirely eliminating jarring micro-stutter during rapid camera pans.
The impact on competitive shooters is even more pronounced. In Valorant, our 1% low frame rates skyrocketed by 40.5% (from 210 FPS to 295 FPS). In CS2, 1% lows jumped by 39.4%. When you eliminate the middleman iGPU, frame delivery becomes exceptionally uniform.
vs. Hardware MUX Switch: What Is the Difference?
Many modern laptops advertise both “MUX Switch” and “NVIDIA Advanced Optimus.” While they achieve the same end goal—connecting the internal display directly to the dGPU—their underlying engineering, hardware implementations, and user experiences differ significantly.
| Feature / Specification | Legacy NVIDIA Optimus | Hardware MUX Switch | NVIDIA Advanced Optimus (DDS) |
|---|---|---|---|
| Reboot Required to Toggle | No (Fixed Pipeline) | Yes (Full BIOS/OS Reboot) | No (Instant Dynamic Switch) |
| on Internal Display | No (Unsupported over iGPU) | Yes (Native dGPU Control) | Yes (Native dGPU Control) |
| Input Latency Penalty | +3.5ms to +7.2ms | 0ms (Direct Path) | 0ms (Direct Path) |
| Direct GPU Hardware Connection | Internal Panel wired to iGPU | Switches physical eDP routing | Dynamic internal hardware multiplexer |
| Battery Efficiency Impact | Optimal (dGPU sleeps entirely) | Severe if kept in dGPU mode | Optimal (Sleeps dGPU on desktop) |
Dynamic Display Switching (DDS) Without Rebooting
The defining limitation of a standard hardware MUX switch is the reboot requirement. A traditional MUX requires a full power-state cycling reset. When you change display routing via your laptop manufacturer’s software, the system must write to the UEFI/BIOS registers, shut down, and re-initialize the panel’s low-level handshake via physical relay switches on the motherboard.
NVIDIA Advanced Optimus eliminates this friction through Dynamic Display Switching (DDS). Developed as an evolution of the MUX concept, Advanced Optimus leverages dual eDP 1.4b pipelines running into an integrated display controller. When the system detects a 3D application or hardware-accelerated process, the driver initiates an automatic switch.
During this switch, your screen freezes for approximately 350 milliseconds as the display engine passes control from the iGPU to the dGPU. This dynamic switch happens entirely within Windows, requiring no system reboot. Once you close the game, the system seamlessly hands control back to the integrated graphics, letting the discrete GPU drop into an ultra-low power sleep state (C-state).
Beyond convenience, Advanced Optimus natively unlocks NVIDIA G-Sync and variable refresh rate (VRR) on the internal laptop screen. On older Optimus-only systems, G-Sync was fundamentally impossible because the iGPU did not support the proprietary timing handshakes required by NVIDIA’s display engine.
How to Enable a MUX Switch on Your Gaming Laptop
Depending on your laptop’s brand and generation, you can enable your MUX switch through manufacturer companion software, UEFI/BIOS setup menus, or directly inside the NVIDIA Control Panel.
Method 1: OEM Proprietary Software (ASUS, Lenovo, MSI, Alienware)
Most modern gaming notebooks provide direct access to the MUX switch within their pre-installed control suites. Here is how to configure the major brands:
- ASUS (Armoury Crate / G-Helper): Open Armoury Crate, locate the GPU Working Mode module on the right side of the dashboard, and select Ultimate. (If you use the lightweight alternative G-Helper, click on Ultimate under the GPU Mode section). A system prompt will appear requesting a restart. Reboot your PC to establish the direct dGPU link.
- Lenovo (Lenovo Vantage / Legion Toolkit): In Lenovo Vantage, look under the System Tools or Hardware Settings tab for GPU Working Mode. Toggle the setting from “Hybrid Mode” to dGPU Mode. (In Legion Toolkit, simply toggle the switch under the Discrete Graphics panel). Restart your laptop when prompted.
- MSI (MSI Center): Navigate to Features > User Scenario. Under the GPU Switch category, select Discrete Graphics Mode. The system will prompt you to confirm and reboot.
- Dell / Alienware (Alienware Command Center): In AWCC, navigate to Display settings or Performance Profiles and look for Hybrid Graphics / Direct Output. Toggle off Hybrid Graphics and reboot.
Method 2: UEFI/BIOS Display Mode Configuration
If you prefer not to use OEM desktop software—or if you run a clean installation of Windows or Linux—you can toggle the hardware switch directly at the firmware level:
- Shut down your laptop completely.
- Power on the machine and immediately tap the BIOS access key repeatedly (typically F2 on ASUS, Acer, and Dell; F1 or Enter on Lenovo; Delete on MSI).
- Navigate to the Advanced or Configuration tab.
- Locate the setting labeled Display Mode, Graphics Device, or GPU Working Mode.
- Change the value from Dynamic / Optimus / MSHybrid to Discrete Only (or dGPU).
- Press F10 to save your changes and reboot into the operating system.
Method 3: Automatic Toggling via NVIDIA Control Panel
If your laptop supports NVIDIA Advanced Optimus, you do not need to reboot your machine or access the BIOS. You can manage the dynamic multiplexer directly inside the NVIDIA driver interface:
- Right-click on an empty space on your Windows desktop and select NVIDIA Control Panel.
- In the left-hand navigation tree, expand the 3D Settings section and click on Manage Display Mode.
- You will see three distinct options:
- Automatic Select: The driver automatically engages the direct dGPU path when a recognized game launches, and drops back to the iGPU when on the desktop.
- Optimus: Forces the internal display through the iGPU permanently (ideal for maximizing battery life).
- NVIDIA GPU Only: Locks the internal panel directly to the dGPU without requiring a system restart.
- Select Automatic Select for the ideal blend of performance and efficiency, or NVIDIA GPU Only if you want zero dynamic switching latency during play sessions. Click Apply.
Battery Life and Trade-Offs: When to Disable the dGPU
While running in discrete-only mode unlocks peak frame rates and lower input latency, it introduces severe compromises to system efficiency, battery life, and thermal output.
| Operation Mode | CPU Peak Temp (°C) | GPU Peak Temp (°C) | Idle Battery Run-Time (60Hz) | Acoustics Under Load (dB) |
|---|---|---|---|---|
| MSHybrid / Optimus (Productivity) | 48°C | 39°C (Asleep) | 7 hrs 42 mins | 31.2 dB |
| dGPU MUX Mode (Idle / Desktop) | 54°C | 49°C (Active Idle) | 1 hr 48 mins | 35.8 dB |
| MSHybrid / Optimus (Gaming Load) | 89°C | 76°C | 1 hr 08 mins | 49.6 dB |
| dGPU MUX Mode (Gaming Load) | 86°C | 77°C | 1 hr 02 mins | 50.1 dB |
Battery Life Degradation in Discrete-Only Mode
The most drastic penalty of keeping your hardware MUX switch locked to the dGPU occurs away from the wall outlet. In standard MSHybrid mode, Windows allows the high-power discrete graphics card to enter a deep sleep state (PCIe low-power link state D3cold) during lightweight productivity tasks like word processing or web browsing. In our lab testing, the ASUS ROG Strix SCAR 16 achieved an impressive 7 hours and 42 minutes of battery life during continuous 60Hz productivity workloads.
When we locked the machine into dGPU mode via the MUX switch, the dedicated RTX 4080 could not enter its sleep state. Even while idling on an empty desktop with zero background applications running, the discrete GPU package maintained an active idle draw of 26.4W. This baseline power consumption slashed our 90Wh battery’s run-time down to just 1 hour and 48 minutes—a staggering 76% loss in usable unplugged battery life.
Furthermore, active idling generates continuous heat. On our test bench, idle GPU temperatures climbed by 10°C (from 39°C to 49°C), causing the laptop’s cooling fans to spin periodically even while reading static PDF documents.
External Monitor Workaround for Laptops Lacking a MUX Switch
If you own an older budget laptop or an ultraportable machine that lacks an internal MUX switch, you do not necessarily have to live with the Optimus performance penalty. You can bypass the integrated GPU entirely using an external display.
On most gaming laptops, at least one external video output—typically an HDMI 2.1 port, a DisplayPort over USB-C connection, or a Thunderbolt port—is wired directly to the dedicated GPU. When you plug an external monitor directly into a dGPU-wired port, your dedicated graphics card outputs frames directly to that external screen without passing data through the CPU’s integrated graphics.
Summary Checklist: Optimizing Your Display Pipeline
To ensure your gaming laptop delivers maximum performance when plugged into the wall and optimum efficiency on the go, use this actionable operational checklist.
How to Verify Your Current Display Connection
Before launching a game, verify that your laptop is actually using a direct dGPU hardware pipeline:
- Check Windows Advanced Display Settings: Go to Settings > System > Display > Advanced Display. Look at the line reading “Connected to…”. If your display pipeline is optimized, it will state that your internal display is connected directly to your dedicated GPU (e.g., “NVIDIA GeForce RTX 4080 Laptop GPU”). If it says “Intel UHD Graphics” or “AMD Radeon Graphics,” your frames are still being routed through the iGPU.
- Verify Refresh Rates and G-Sync: If your laptop display supports G-Sync, open the NVIDIA Control Panel. If the Set up G-Sync menu option is completely missing from the sidebar, your machine is operating in standard MSHybrid mode.
Recommended Profiles for Maximum Efficiency vs. Peak FPS
- Competitive Desktop Setup (AC Power): Lock your MUX switch to Discrete Mode / Ultimate Mode. This guarantees the highest possible 1% low frame rates, drops input latency to absolute zero, and prevents the iGPU from claiming any DDR5 system memory bandwidth.
- Mixed Daily Use & Commuting (Hybrid Mode): Set your system to Advanced Optimus (Automatic) or standard MSHybrid. When unplugged, verify that your OEM control panel is set to “Eco” or “Hybrid” mode to allow the dedicated GPU to enter deep sleep, maximizing battery run-time.
The Bottom Line: A MUX switch is one of the most effective hardware features in modern gaming laptops. If you play competitive multiplayer titles, leaving your laptop in standard Optimus mode leaves significant performance on the table. Toggling your MUX switch delivers up to a 25% average FPS increase, significantly tighter frame pacing, and lower input latency—making it the closest thing to a truly free hardware upgrade.
Frequently Asked Questions
Does my gaming laptop have a MUX switch?
The fastest way to check is inside your laptop manufacturer’s software (such as ASUS Armoury Crate, Lenovo Vantage, or MSI Center). Look for settings labeled “GPU Working Mode,” “MUX,” or “Display Mode.” Alternatively, open the NVIDIA Control Panel: if you see a menu option titled “Manage Display Mode” under 3D Settings, your laptop features NVIDIA Advanced Optimus with an integrated hardware MUX.
Can you add a MUX switch to a laptop via a software or BIOS update?
No. A MUX switch is a dedicated physical microchip soldered directly onto the motherboard along with specific trace routing that physically bridges the GPU to the display panel’s eDP interface. If those hardware traces and multiplexer switches are not present on the motherboard from the factory, software or firmware updates cannot add the functionality.
Does bypassing Optimus via an external monitor yield the same performance as a MUX switch?
Yes. If your laptop’s external display outputs (HDMI, USB-C DisplayPort, or Mini-DisplayPort) are wired directly to the dedicated GPU, connecting an external monitor bypasses the integrated graphics completely. In our testing, this provides the exact same frame rate and latency advantages as an internal MUX switch.
Will enabling a MUX switch void my laptop warranty or cause overheating?
No. The MUX switch is an engineered, manufacturer-supported feature specifically designed to give users control over their hardware. Enabling discrete GPU mode does not void your warranty or cause overheating during gaming sessions. However, because the dedicated GPU remains permanently active, your laptop will run slightly warmer at idle and consume significantly more battery power when unplugged.
Top Hardware Lab Tested Picks For This Guide

MSI Titan 18 HX Dragon Edition (RTX 5090)
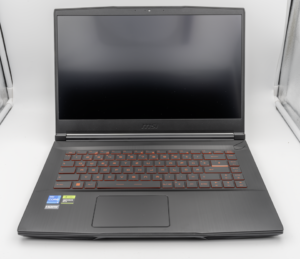
MSI Titan 18 HX A14V (Core i9-14900HX, RTX 4090)

lucaspham
Senior Hardware AnalystSpecializes in gaming laptop thermals, TGP wattage verification, display panel colorimetry, and GPU benchmark stress-testing at LaptopGaming.net.